

Menus are the navigation links, usually at the top of your site, that help visitors move between sections. Menus often link to categories, so create your categories first.
Create categories #
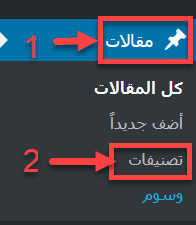
In your WordPress dashboard, go to Posts, then Categories.
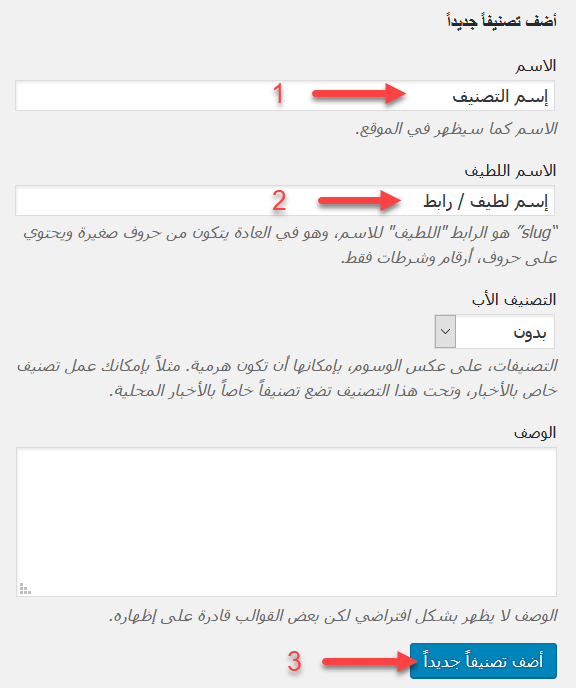
Enter the category name and its slug (the part used in the link). For example, name: Small Cars, slug: small-cars, which appears as yoursite.com/category/small-cars. Then click Add New Category.
Create menus #
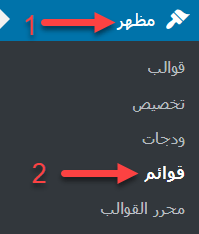
Go to Appearance, then Menus.
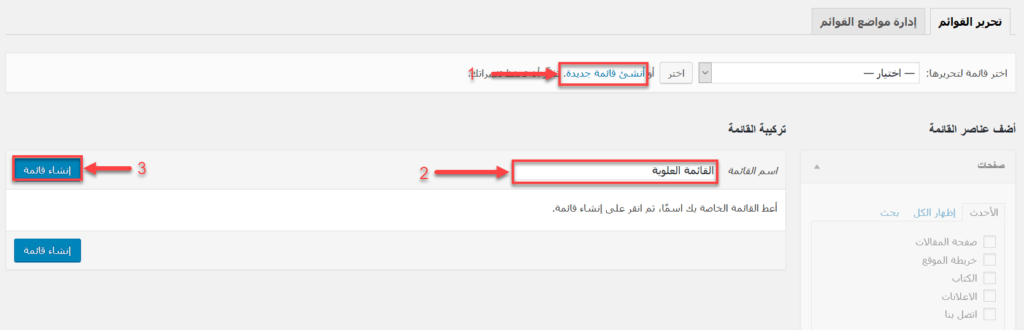
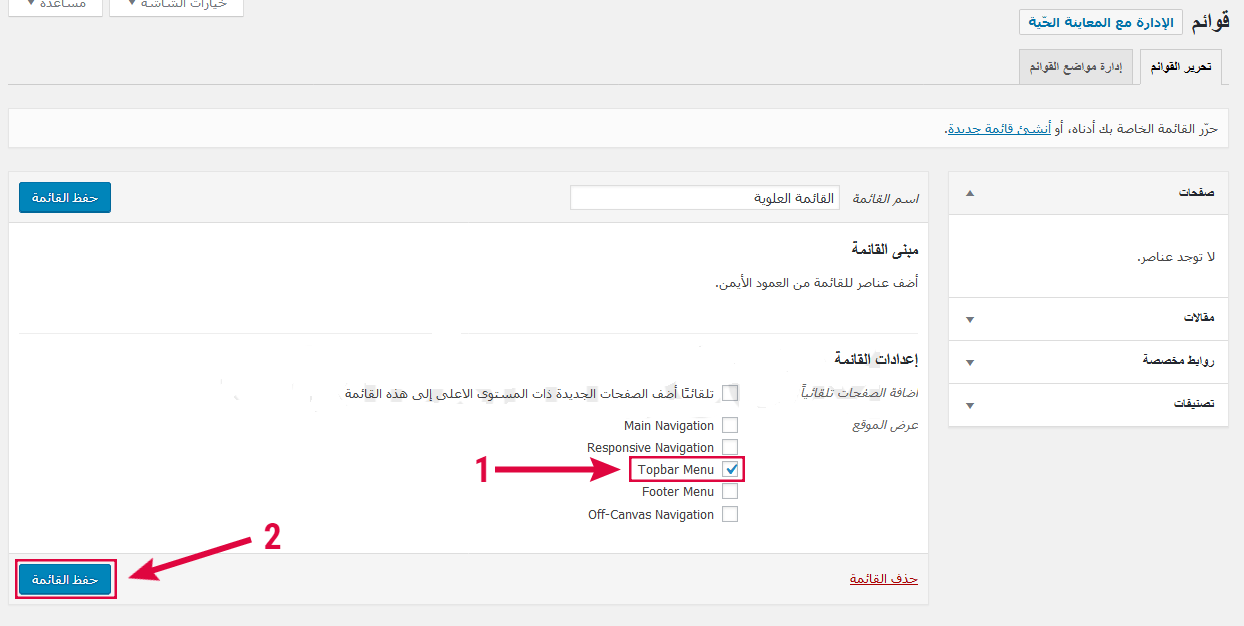
Themes usually have several menu locations, such as a top bar, the main navigation and the footer. Click create a new menu, enter the menu name and click Create Menu.
Choose where the menu appears in your theme (for example Topbar Menu) and click Save Menu. Repeat for the main navigation and footer menus.
Add a category to the main menu #
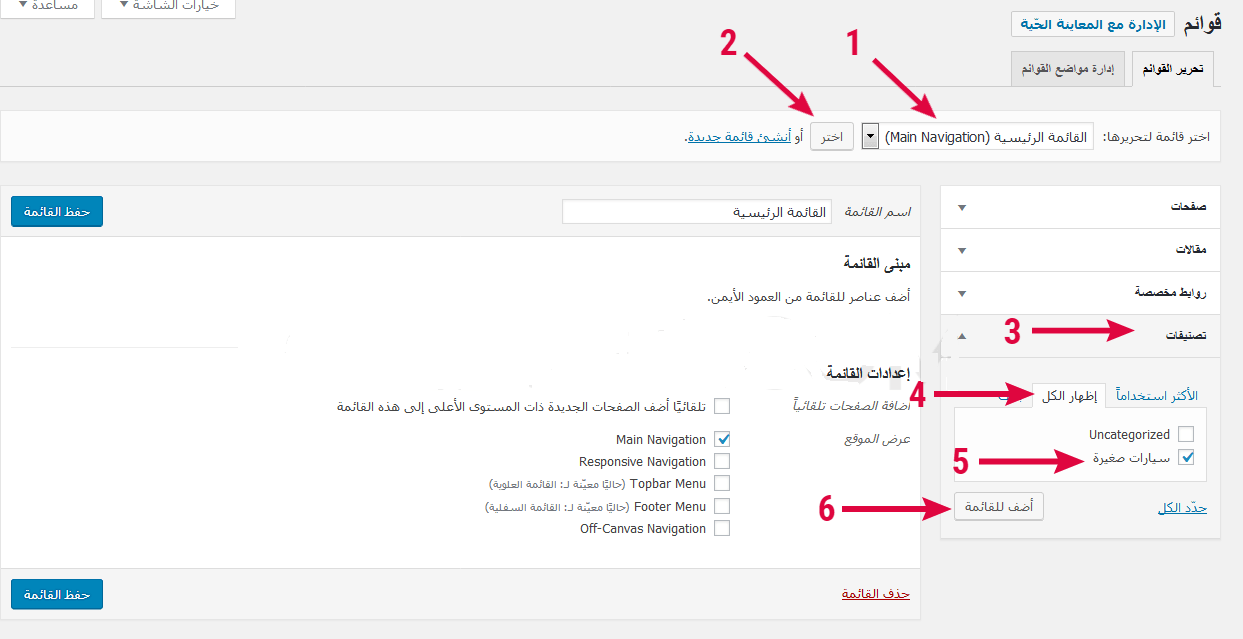
In Appearance, Menus, select the main menu and click Select. Open Categories, click View All, tick the category you want and click Add to Menu.
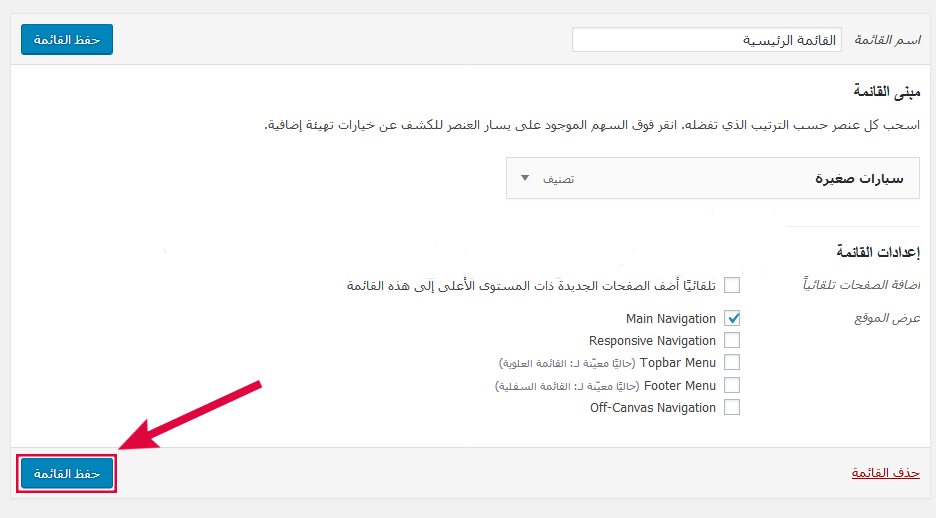
The category appears in the menu. Click Save Menu.
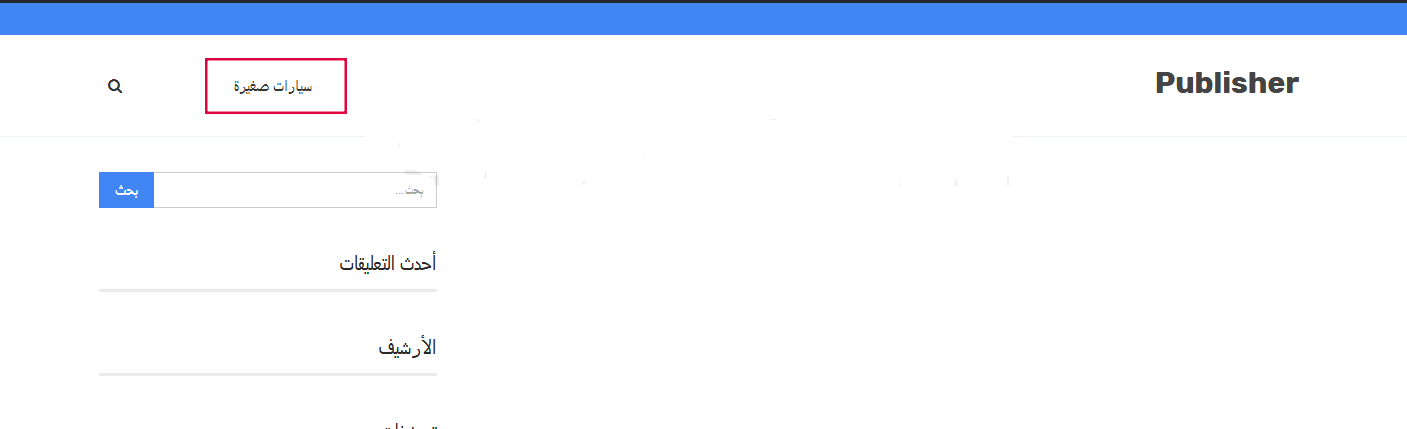
Visit your site and you will see the category in the main menu.
Note: if your theme is a block theme (such as Twenty Twenty-Four), the Menus page is not available. Edit the Navigation block from Appearance, Editor instead.
Related service: Hyyat Host WordPress hosting with WordPress Toolkit, fast NVMe storage and 24/7 support.